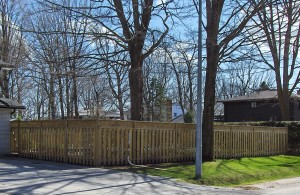
Almost anyone can build a wood fence with good planning, some basic carpentry skills and the right tools for the job. The most difficult part may be trying to decide on the style of fence (there are many different types), the type of building materials and possibly some hard work.
Before you get started, and certainly before you did any holes, you should contact your local utilities to determine and mark the locations of any lines for gas, water, hydro, etc. Most regions have a single “Call Before You Dig” phone number you can call to get all the marking done.
It is a good idea to check first with local building codes and ordinances in your area. Most jurisdictions require a building permit that may have requirements and/or restrictions that must be followed. They could influence your decision about the height, style, setback and material of your fence. Check for post size, height and depth requirements for your area. It is also worth checking to see if there are any approvals from other agencies such as Conservation Authorities.
Wood and Nails
Most fences are made of pressure treated wood and use only rust-resistant hardware such as hot-dipped galvanized or aluminum nails, galvanized bolts, screws, hinges and catches. Your fence will last longer.
Accuracy of Design
First off you will need to plot your fence line. Unless you are marking joint boundary lines with your neighbour so as to share the cost, build the fence 1 to 2 inches on your side of the line. This will eliminate possible boundary disputes with neighbours in the future. The best way to mark the line is with the survey you may have obtained when you bought your house.
The accuracy of your fence line will determine the straightness of your fence so mark it carefully. Plot a fence line by marking each corner post with a solidly driven stake. Run a tightly drawn string line between the stakes, using the line and a level to locate sites for all posts. Mark each post spot with a temporary stake.
Digging the Holes
The next step is digging the post holes. If the posts are not set firmly or deep enough into the ground this may result in your newly built fence tilting, collapsing or heaving in cold weather. The posts must go well below the frost line to stay in place for years to come.
In most cases digging with a shovel will result in inaccurate hole locations and not provide the consistent depth deeded. Manual post hole shovels are labour intensive and time consuming. Digging may reveal rocks and other obstacles where only a commercial auger operated by a professional will suffice. You will save time and possible injury by hiring a professional to dig your post holes with an auger.
Placing the Posts
After you have had the post holes dug, be sure to call in an inspector if you are required to do so as a condition of any building permit. Inspectors are usually looking for a certain required depth.
Posts can be set in earth and gravel, but concrete provides the strongest installation. Check out the various concrete options as some are easier than others. Many people today use a mix that is just right for posts. All you do is pour the mix in the hole, add water and stir. Be sure to plan and time your work carefully, because if concrete seeps under the post it can retain moisture and speed decay. Begin with the corner posts – you’ll need them to plumb and align remaining posts. Plan one and a half bags of concrete mix for a 4-inch post set 3-feet deep one bag for 2-feet deep posts. Place a large, relatively flat stone in the bottom of the hole, then fill it with gravel (about 6 inches), or until it is level with the top of the stone. Continue to plumb and align the post while adding concrete (2-3 inches at a time), tamping it in. It is a good idea to add another 1-2 inches of concrete above ground, sloping it away from the posts for water runoff.
Be sure to double check and triple check your posts for plumb and alignment. You’ll have about 20 minutes to move your posts after pouring. And wait at least 2 days before installing the rails and siding so the concrete is cured.
Align each fence post so they are exactly vertical and in a straight line. The most common aligning method is the end post or corner post method, though it may be impractical for fences longer than 100 feet. Begin with your two corner posts. Position posts with their faces in flat alignment and plumb them with a level.
Next, nail a 2-inch-long 1 by 2 spacer block to each post -about 1 foot above the ground. Stretch and tie a mason’s line between the posts, making sure the blocks are between the line and the posts. Then tie a second mason’s line at the top of the posts.
With lines intact, set and align each post so their faces are exactly the thickness of a 1 by 2 (3/4 inch) away from the lines. Before and after filling each post hole with concrete, check each post for plumb and alignment, using a level on two adjacent faces.
ATTACH RAILS AND SIDING TO COMPLETE YOUR FENCE
Once the fence posts are set and aligned the most difficult part of building your fence is over. The next steps include attaching the railings, installing kick boards (if you plan to use them), and securing the siding like boards, pickets, panels and other material.
Once the fence posts are set and aligned, the next step is to attach the rails, install the kick-boards (if you plan to use them) and post the siding (boards, pickets, panels, or other materials).
Even though setting and aligning the fence posts are the most difficult parts to building to a fence, you still need to be careful when you fit, level, and fasten the rails. That is because this part of the framework ties the fence together and must support the weight of your siding.
You will need a hammer, lots of nails, a good level, lots of string and a circular saw. Check to see if you set the top of the posts at their finished height, adds if you have not done so yet, do it now.
Now you’re ready to join the rails to the posts. Decide how many railings you want between the posts. Most fence designs require at least two railings, but for added strength use three railings, or install a wood or masonry support under the center of the bottom rail. Place the railings on edge, so the siding is less likely to sag, especially if you plan to use heavy siding.
Attach the rails to the fence posts with fence brackets or angle brackets, or by toe nailing them. You can buy them at your local hardware store. Nail 2 X 4 cleats to the posts for extra support (if you plan to toenail the rails).
Determine if you want to use butted or lapped rails. Lapped rails are the easiest to install and are most often used with vertical board fences.
Level the rails and nail them to the posts using hot-dipped galvanized common, or box nails that are at least three times as long as the thickness of the rails. When attaching the railings, keep in mind if the railings meet at a corner, miter the ends. If they meet on an intermediate post, butt the ends at the middle of the post. Butted rails should be cut to fit snugly between posts.
Kick boards are installed for decorative and technical reasons. On board and panel fences, siding is usually added 6 to 8 inches above the ground to keep it from rotting. To close this gap, a kick board may be installed by nailing it to the bottom fence rail before the siding is attached.
Use decay resistant, 1 X 8, or 1 X 10 wood for your kick boards. Center the kick board under the bottom rail (secured with a cleat), or nail it to the face of the post and the bottom rail. Allow the kick board to extend at least 4 to 6 inches into the ground to discourage animals from digging under the fence.
After you’ve attached the kick-boards you can begin with the siding. Even though this is the easiest part of building a fence, don’t be tempted to start nailing without double checking if the framework is straight, because if your framework is not straight, the siding will make any problem very apparent.
The technique you use to attach the siding depends upon the type of material you use. If you’re using panels for siding, consider using a helper or two to lift and hold the panels while you level and nail them into place. On the other hand, nailing boards, slats or pickets can be a one man job. Use a level to check each board for plumb before nailing them to the rails. If you installed kick boards, and they are level, you can rest the siding on top of them. Otherwise, stretch a mason’s line tightly along the fence where you want the bottom of the siding to end, checking the line with a level, to determine the bottom part of the fence siding. And of course, make sure all boards are the same length.
Finish the top of your fence with decorative lattice topper.
Now sit back in your lawn chair and admire your handiwork. Congratulations!


